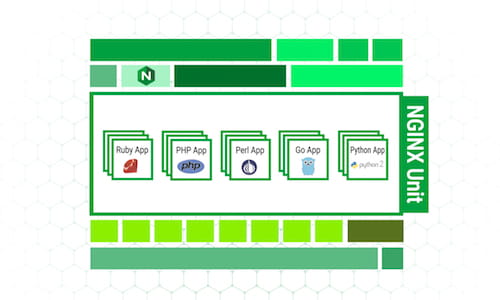
Today we’re releasing the second in our series of videos about NGINX Unit: Live App Updates at 100% Uptime. To help you get the most out of the video, this post provides all the background and details you need to understand what’s happening at each step as we update an application in a multilingual NGINX Unit environment without any service interruption or downtime.
A Quick Review of NGINX Unit
NGINX Unit is an application server that handles multiple languages and applications at once, with an API that lets you dynamically upgrade components of a multilingual application without application downtime or disruption to your infrastructure.
The NGINX Unit API consists of several objects. Here we’re working with the following three:
- The configuration object stores the current configuration.
- An application object describes an application as a collection of parameters: some general ones that apply to all application languages and some that are language‑specific. (See all the options here.)
- A listener object defines the IP address and port where NGINX Unit listens for client requests to a named application.
You use the GET, PUT, and DELETE methods in the NGINX Unit API to configure the objects. Because the API is HTTP‑based and represents objects in JSON format, you can use any RESTful tool of your choice to control it. In the videos and this post we use the curl command and access the API in the conventional way, on a Unix domain socket named by the --unix-socket option.
We recommend that you use NGINX in front of NGINX Unit, for features like request routing, authentication, rate limiting, and static file delivery. For instructions, see the NGINX Unit documentation.
Configuring a Multilingual Application
In the video, we start with applications written in each of the following languages: Ruby, PHP, Perl, Go, and Python 2. Having more than one language is typical of modern applications.
We have already configured our applications in NGINX Unit by creating the following .json files, one for each of our applications, to specify the required parameters for application objects written in that language. (In future posts, we’ll go over each language’s requirements in detail.)
- go-app.json
- perl-app.json
- php-app.json
- python2-app.json
- ruby-app.json
Creating a file is optional – you can generate your JSON payload dynamically or type JSON‑formatted configuration on the curl command line – but it’s an easy way to get started with a large amount of preset data. Similarly, you can put the configuration for all applications in a single file, but having a separate file for each application lets each DevOps team easily manage its own configuration, and makes it easier to make changes to a single application at a time.
For each application, we add the contents of the file to the NGINX Unit configuration object with an API call in the following format. This example is for ruby-app.json. As we repeat the command for each application, we substitute the path to its configuration file.
$ curl -X PUT –data-binary @/var/www/unit-ruby/ruby-app/ruby-app.json –unix-socket /run/control.unit.sock http://localhost/config/applications/ruby-appWe also add listeners for each application:
$ curl -X PUT –data-binary ‘{“application”:”ruby-app”}’ –unix-socket /run/control.unit.sock ‘http://localhost/config/listeners/*:8100’We set up an access log, which is optional:
$ curl -X PUT –data-binary ‘”/var/log/access.log”‘ –unix-socket /run/control.unit.sock http://localhost/config/access_logAt any time, you can display all or part of NGINX Unit’s current configuration object by calling the GET method on a URL path that starts with http://nginx-unit-host/config/. We encourage you to check your configuration frequently, especially during active modifications and updates. Below is an example that shows the output after we have issued the previous commands to load the configuration file for each application, define the listeners, and initialize the log file:
$ curl –unix-socket /run/control.unit.sock http://localhost/config/
{
“listeners”: {
“*:8100”: {
“application”: “ruby-app”
},

“*:8200”: {
“application”: “php-app”
},

“*:8300”: {
“application”: “perl-app”
},

“*:8400”: {
“application”: “go-app”
},

“*:8500”: {
“application”: “python2-app”
}
},

“applications”: {
“ruby-app”: {
“type”: “ruby”,
“user”: “nobody”,
“processes”: 2,
“script”: “/var/www/unit-ruby/ruby-app.ru”
},

“php-app”: {
“type”: “php”,
“user”: “nobody”,
“processes”: 2,
“root”: “/var/www/unit-php/phpinfo-app”,
“index”: “index.php”
},

“perl-app”: {
“type”: “perl”,
“user”: “nobody”,
“processes”: 1,
“working_directory”: “/var/www/unit-perl/perl-app”,
“script”: “/var/www/unit-perl/index.pl”
}

“go-app”: {
“type”: “go”,
“user”: “nobody”,
“executable”: “/var/www/go-app”
},

“python2-app”: {
“type”: “python 2.7”,
“user”: “nobody”,
“processes”: 2,
“path”: “/var/www/unit-python2.7/python-app”,
“module”: “wsgi”
},
},

“access_log”: “/var/log/access.log”
}
Updating an Application
What do we do when we receive a new version of the Python application from our developers, upgraded to Python 3 from Python 2? It needs to be added into our stack without disruption to our production environment.
In production environments that require 100% uptime, updating an application is a three‑step process:
- Create the new application and a temporary listener
- Reassign the production listener object to the new application
- Delete unused configuration objects
Step 1: Create the New Application and Temporary Listener
We’ll start as before by creating a .json file of configuration for the Python 3 application, called python3-app.json.
We upload the data from the file into the NGINX Unit configuration:
$ curl -X PUT –data-binary @/var/www/unit-python3/python3-app/python3-app.json –unix-socket /run/control.unit.sock http://localhost/config/applications/python3-appWe add a temporary listener to access it:
$ curl -X PUT –data-binary ‘{“application”:”python3-app”}’ –unix-socket /run/control.unit.sock ‘http://localhost/config/listeners/*:8800’The python3-app is now active and listening on the temporary port 8800 for testing.
Step 2: Reassign the Listener
Once we have sent a bit of traffic to the new application to verify that it is running correctly, we reassign the production listener port, 8500, to it:
$ curl -X PUT –data-binary ‘”python3-app”‘ –unix-socket /run/control.unit.sock ‘http://localhost/config/listeners/*:8500/application’Step 3: Delete Unused Objects
Now that we have nothing running on port 8800, we can delete the temporary listener:
$ curl -X DELETE –unix-socket /run/control.unit.sock ‘http://localhost/config/listeners/*:8800’Once we ensure that the system is running correctly with the new python3-app application version, we remove the old python2-app:
$ curl -X DELETE –unix-socket /run/control.unit.sock http://localhost/config/applications/python2-appWe run the following command to show NGINX Unit’s configuration; the output shows that python3-app has replaced python2-app:
$ curl –unix-socket /run/control.unit.sock http://localhost/config/
{
“listeners”: {
“*:8100”: {
“application”: “ruby-app”
},

“*:8200”: {
“application”: “php-app”
},

“*:8300”: {
“application”: “perl-app”
},

“*:8400”: {
“application”: “go-app”
},

“*:8500”: {
“application”: “python3-app”
}
},

“applications”: {
“ruby-app”: {
“type”: “ruby”,
“user”: “nobody”,
“processes”: 2,
“script”: “/var/www/unit-ruby/ruby-app.ru”
},

“php-app”: {
“type”: “php”,
“user”: “nobody”,
“processes”: 2,
“root”: “/var/www/unit-php/phpinfo-app”,
“index”: “index.php”
},

“perl-app”: {
“type”: “perl”,
“user”: “nobody”,
“processes”: 1,
“working_directory”: “/var/www/unit-perl/perl-app”,
“script”: “/var/www/unit-perl/index.pl”
}

“go-app”: {
“type”: “go”,
“user”: “nobody”,
“executable”: “/var/www/go-app”
},

“python3-app”: {
“type”: “python 3.5”,
“user”: “nobody”,
“processes”: 2,
“path”: “/var/www/unit-python3.5/python3-app”,
“module”: “wsgi”
},

“access_log”: “/var/log/access.log”
}
Conclusion
With NGINX Unit you can achieve zero‑downtime, non‑disruptive rolling updates to your applications with no extra infrastructure overhead. To learn more, see the NGINX Unit documentation.
Be sure to check out the first video in our tutorial series, What Is NGINX Unit?.

